
In the past I always spent way too long trying to find or make images for my blog posts by either scanning the internet or by using tools like Canva to build them from scratch essentially until they rolled out the AI feature that could knock it out in about thirty seconds, the key is to try and avoid stock-photo-looking images and find some actual good ones that fit my content and the overall feel of my brand. Once I made the switch I was frustrated that I had been doing it the hard way for so long – I know this is not a problem unique to me – hopefully this will help!
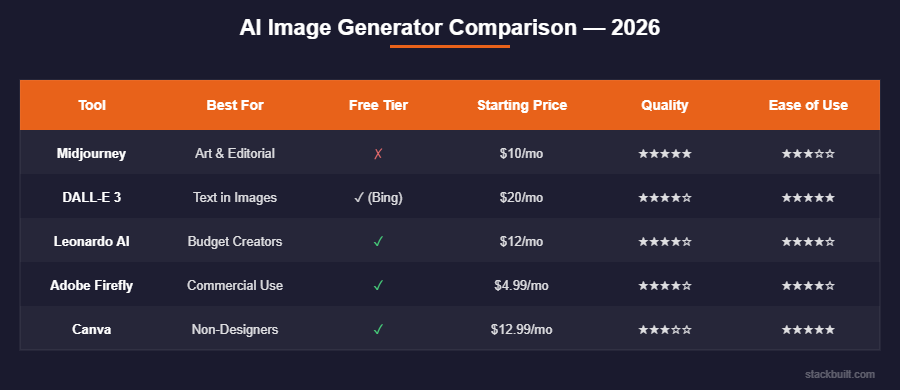
If you are creating content – then more than likely you will need some quality images – for social media, blog posts, newsletters, products, and basically everything else… And the AI image generation space has gotten absurdly good in 2026 so I want to walk you through some options that I think are actually worth knowing about.
The Top Tier – Best Quality and Most Consistent
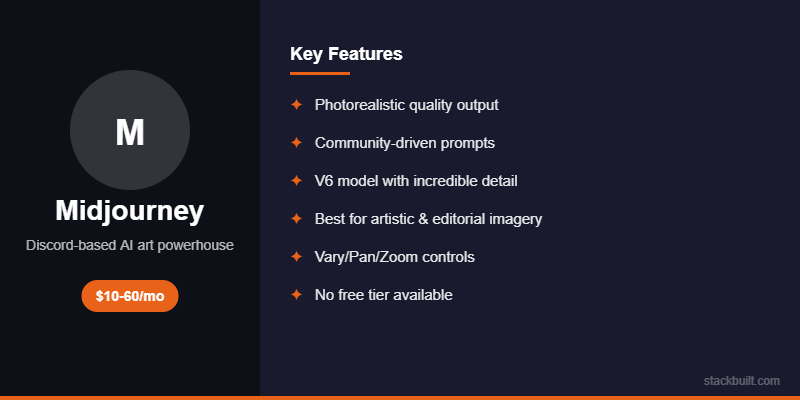
Midjourney
Midjourney (AI) is the king when it comes to pure image quality and ability to adjust the images. The latest version of Midjourney can create images that look like professional photography or high-end illustration depending on the style you ask for, and the photorealistic stuff is scary good. Using the right prompts is the major lift – and you will see quickly that it is not hard toget some solid images even with beginner prompts. The stylized art is great too – I have been pretty impressed with the outputs I have seen from not only my prompt creations but also other creators using it.
The catch though is that the interface is Discord-based, so you type your prompts into a Discord channel and then wait for results which is a little clunky but only for the first few times using it. It works fine once you’re used to it but I will not pretend the learning curve for prompting isn’t steep. The difference between a mediocre Midjourney image and a stunning one really does come down to how well you write the prompt, and that takes a good amount of practice and experimentation to get the hang of. Here is where you can start to stack other tools though. I use Clause to produce prompts that I plug into Midjourney to create the perfect pictures.
When we start looking at price you’re looking at $10/month for the Basic plan – which gets you a solid 200 image generations, or you can step it up to the $30/month for the Standard plan which gives you unlimited slow generations and about 15 hours of fast ones. For the early days of being a content creator – one who needs several images per week I think the Basic plan is probably enough to get started.
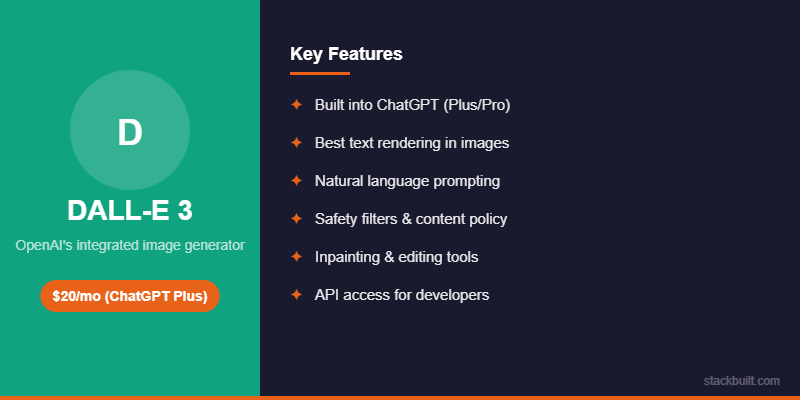
DALL-E 3 (via ChatGPT)
Now to use the tools that might already be at your disposal – If you’re already paying for ChatGPT Plus at the $20/month price point – then you already have access to OpenAi’s image generation tool, DALL-E 3, which is built right in, and it’s really good – I would say maybe 85 to 90 percent of Midjourney quality for most use cases which is more than enough for blog content. You will also get a ton more images then the basic plan from Midjourney.
The advantage with DALL-E is that you just describe what you want in plain natural language and it figures it out – just like using the prompt that most people use the AI LLMs for already. Something like “a modern home office desk with a laptop showing a blog dashboard, warm lighting, minimalist style” and it just spits it out for you. You may need to give some revisions to help tweak it to as close as possible to meeting your mental image. You don’t need to learn a special prompting syntax the way Midjourney requires – you just talk to it like a person (or like you are talking to an AI) and it understands what you’re going for, which I find is a massive time saver when you’re trying to knock out a bunch of images in one sitting. Like all the other tools – it is continuing to get better with every update.
For the blog featured images specifically, using DALL-E 3 has become a go-to for me because the output is clean, professional, and it matches the idea I have in my head. I describe the image I am picturing without needing to iterate on the prompt fifteen times. I can usually get something usable on the first or second try – again, we are looking for ways to save time and speed up the process.
There are of course some limitations, I should mention – it can be overly cautious about generating certain types of images. Sometimes it flat out refuses requests that are completely benign because the safety filters are a little too aggressive – this just means that you need to take the time to reword your prompt to make it work, and that can be frustrating when you’re just trying to make a blog header and there’s nothing remotely problematic about what you’re asking for. It will learn and so you will you though, and eventually you will know how to avoid the safety triggers.
The Mid Tier – Great Value With Some Trade-Offs
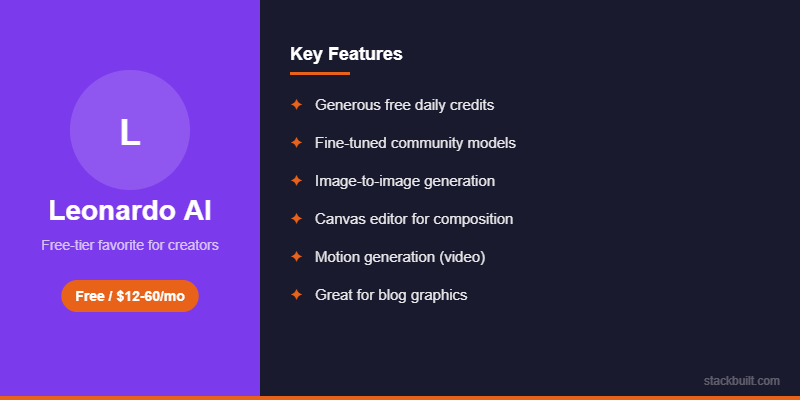
Leonardo AI
Here is an option that often flies under the radar – I think more people should know about it and the advantages that it offers. Starting off of course with the free tier, which gives you around 150 generations per day (PER DAY) which is super generous, and the quality is legitimately competitive with Midjourney for artistic and stylized images. With that count you can get all of your image needs spread across a week – no doubt.
Leonardo does really excel in image consistency – it can generate the same character across multiple images which is great if you want a mascot or recurring visual element. Being able to conjure up the same images or themes is a massive plus. ItLeonardo also does specific art styles really well like anime, watercolor, 3D render, and pixel art, and it’s fast – I find similar art that I like or a specific artist and I build a prompt around that using Claude. It is also noticeably faster than Midjourney in my experience, again – we are looking for time savings here.
Of course though like EVERY tool there are some places it doesn’t do as well – for Leonardo specifically it is the photorealistic images – they’re not quite as polished as what you get from Midjourney or DALL-E 3 and there’s that slight “AI look” to the photorealistic generations that just does not look quite right. Using it for blog content though, where you’d want a consistent visual brand or theme, the consistency feature in Leonardo is useful too because you can generate a mascot or avatar once and then use it across all your content which gives everything a cohesive feel. That cohesive feel is really important to me.
When we start looking at the price – the free tier is very generous. The paid plans are pretty affordable as well and start at $12/month if you need more generations and the additional features offered by the higher tiers.
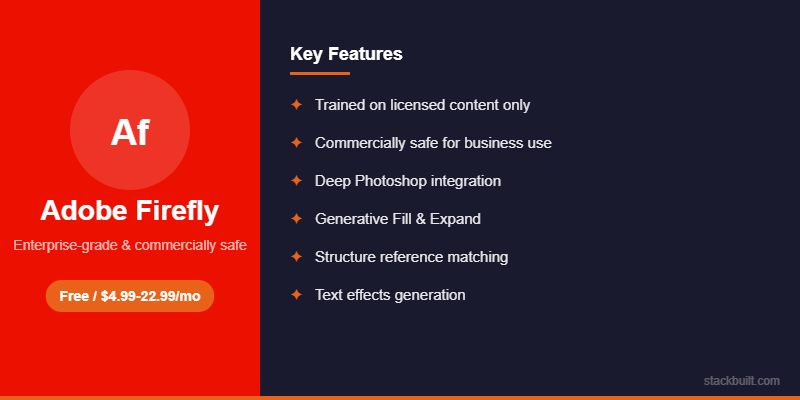
Adobe Firefly
This is ole’ Adobe’s entry into AI image generation and it’s as you can imagine it is integrated into Photoshop and their Creative Cloud suite.
The main advantage here is that if you already use Adobe products then Firefly is baked right into your existing workflow. You can generate an image, edit it in Photoshop, and export without bouncing between different apps which saves a surprising amount of time when you’re working on multiple pieces of content.
The quality is good but not great if I’m being honest – it sits somewhere between Leonardo and DALL-E 3 in my testing. The style tends to lean toward “stock photo” which is fine for blog images but it doesn’t have the artistic range of Midjourney or Leonardo. If you’re already paying for Creative Cloud though it’s included so there’s no reason not to use it as part of your toolkit.
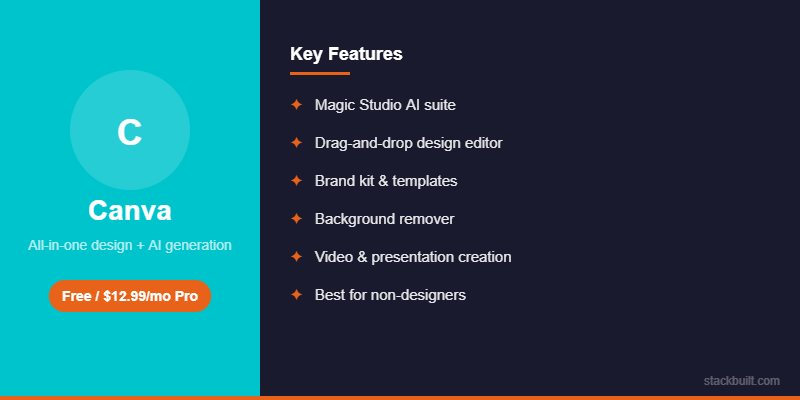
Canva AI Image Generation
I did mention Canva at the start – I need to give their AI image features their own section. For content creators specifically, the Canva products and capabilities are very practical and user friendly in a way that the standalone tools aren’t. Plus their UI (user interface) is phenomenal.
Canva has the Magic Media tool which is their text-to-image generator, the images are populated directly inside your Canva design. The workflow then becomes – create your blog header layout, then generate a custom image in the same canvas you are already working in, and drop it in, add your text overlay etc, and export and you are ready to incorporate! All this can be accomplished within their web based interface without leaving Canva and all in one sitting which is exactly how I prefer to work – go fast and efficient.
The quality is of course a step below DALL-E 3 and Midjourney but the convenience factor is massive and honestly for most blog headers and social media graphics you really don’t need Midjourney-level quality – you need something that looks good and fits your brand and Canva delivers on that.
Canva Pro runs $13/month and includes the AI image features plus everything else Canva does. If you’re already paying for Canva (and I think most content creators probably should be at this point) then you get image generation included at no extra cost.
The Budget Option – Free Tools That Actually Work
Bing Image Creator
This one is completely free and it uses DALL-E under the hood so the quality is surprisingly close to ChatGPT’s DALL-E implementation which most people don’t realize.
You get a certain number of “boosts” which are basically priority generations per day, and after those run out the generations are slower but they still work just fine. I used this for dozens of blog images back when I was testing whether AI images were even viable for my content before I committed to paying for anything, and it did the job well enough to convince me.
If you’re on a zero budget and you need decent images to get started I would honestly say to start here because there’s no sign-up required beyond a Microsoft account and the results are better than most people expect.
Playground AI
Playground AI has a free tier with 500 images per day which is kind of absurd when you think about it. The quality varies quite a bit depending on the model and settings you choose but at that volume you can experiment until you land on something that works.
I find it’s good for social media images and quick graphics but less consistent than the paid tools when you need polished blog headers that match a specific brand aesthetic. Still though for the price of free it’s hard to complain.
What I Actually Use for My Blog
Here is my honest workflow and what I actually spend my time on.
For featured images I use DALL-E 3 through ChatGPT – I describe the scene I want, get a couple options back, pick the best one, and move on. The whole thing takes maybe two minutes per image and I have gotten pretty efficient at writing prompts that get me close to what I want on the first try.
For both my blog and my actual 9-5 the custom graphics, comparison charts, infographics, and branded elements I like to use Canva because the templates make it fast and the brand kit keeps everything looking consistent across all my content.
For screenshots I just take actual screenshots of the tools I’m reviewing and I want to stress that this is probably the most important visual element for product reviews specifically. Real screenshots of the actual product build trust in a way that AI images never will, and your readers can absolutely tell the difference.
I don’t currently use Midjourney even though the quality is kind of the best, and the reason is simply that the Discord-based workflow doesn’t fit how I like to work. If Midjourney ever releases a proper web app with a more traditional interface like some of the other platforms then I will 100% reconsider giving it another try because the output quality is stunning – usability is still a big deal for me. Until then – I am a big proponent of Canva. I use this for content and also for my day job which requires a decent amount of presentations.
Tips for Using AI Images on Your Blog
When you start using AI images to populate your content – the first thing I would offer is to try and keep things consistent. Pick one or two visual styles that you really like and stick with them across your blog content because random style shifts will look disjointed and are unappealing to the eye. Canva’s brand kit is absolutely helpful for this part and will keep you on a consistent path.
I also strongly recommend against using AI images as product screenshots, take the time to actually get the right images – AI can still help you in gathering these up from the web though. If you’re reviewing a product then screenshot the actual product – your readers can tell when a product image is AI-generated and it will absolutely tank your credibility, especially in the tech and tools space where your audience tends to be pretty savvy. Again – either you can do it or have the AI find the real images and collect a number of them for you to use in the content.
Always double-check your images for AI artifacts before publishing. Things like extra fingers on hands, weird text in the background, and melting edges on objects are less common in 2026 than they used to be but they still happen occasionally and nothing undermines your professionalism faster than publishing an image with obvious AI glitches.
On the legal side of things – the copyright situation with AI images is still evolving and I think it’s worth being aware of even if it doesn’t affect most bloggers directly. For blog content you’re generally fine but I would be cautious about using AI-generated images for products you’re selling or in any context where ownership and rights could become an issue. I am of course not a lawyer so please do your own research on this one.
And finally – alt text matters more than most people realize. Write actual descriptive alt text for every image you publish, not just for accessibility (though that’s important on its own) but also for SEO because Google reads alt text and uses it to understand your content. Something like “AI generated image of modern home office with dual monitors” is way better than “featured-image-1.jpg” when it comes to helping your pages rank.
My total monthly spend on image generation is basically nothing extra at this point. DALL-E 3 comes with my ChatGPT Plus subscription that I’m already paying for, and Canva Pro was already in my stack. If you’re new to the content world and starting fresh as they say – then you need to add at least one image tool to your workflow – of the ones above I recommend Canva Pro at $13/month and it will cover about 90% the content needs for your site/socials and you can always ramp up and add another tool like Midjourney or a standalone tool later once you have a better sense of what your specific content requires. You got this!!
Keep Reading
If you found this helpful, check out these related guides:
